COMING SOON…..

Hello again. I am working on revamping my blog and gain a presence on YouTube per request, which is exciting and scary all at the same time. A lot has happened since I have taken my crafty blog break. I have been active on #instagram #sewmuchglitter so please check that out or swing by #facebook to take a look. I have a whole new life now, more authentic but am grateful for what I have lived and the family I have raised. They are grown, it is my turn to #spreadjoy by doing what I love and that is #cardmaking and other projects in the artsy world. While things are under construction and in-between my projects, check out arteza.com at all of their great art supplies. I will be working with my favorite arteza product on my social media soon. Don’t forget to leave a comment with your favorite arteza product and we can craft together soon my crafty friends!

Color your life

Thanks for coming back! I know I have been gone awhile but the change in seasons brought a change of pace as well. We went from summer to HOT and being surrounded by wildfires but our immediate area is safe so far. We also became a college campus because our college freshman has to do online school. In the middle of the change nothing has been easy. I know I am not alone during these trying times. So, crafting truly has become my therapy. With that said, I would love us to support each other. Post your favorite therapeutic craft in the comments below.

I recently made a purchase to upgrade my alcohol markers, I had the original Spectrum Noir alcohol markers and could never perfect the blending. I gave up for awhile and used colored pencils and gamsol, which works great but sometimes I want a more vibrant result. I invested in the Tri-blend Spectrum Noir markers. If you are on the fence about alcohol markers, jump over to the other side! These things are fabulous. There is no guess work and you do not need to be a professional artist to get professional looking results.

No professional swatching here

I always swatch my colors on a paper that I use most (go check out my previous blog post about my favorite papers and the mediums I use with them). This allows me to see the blend before I start a project. Unlike other alcohol markers, Spectrum Noir suggests laying down the light color first (saturate the paper, look on the back to make sure you’ve done so) then move to the darkest color where you want shadows and blend out with the medium tone then back to the light color for a smooth finish. This worked perfectly for me but like any new medium, it does take practice and patience.

I truly enjoy using my stamp collection and coloring in those images. I ordered these from Crafter’s Companion website and was pleasantly surprised at the ease. The product does come from the UK and shipping is a bit higher than local companies but it does seem to be flat rate, so adding some more fun items in your cart is worthwhile. You also earn reward points when you create a free account and get discounts on future orders. Check it out!

With the change on the calendar, it is time for some Halloween crafting. I used these markers with a new stamp set I purchased from The Stamps of Life, with flawless results. If you want to see what else I have been crafting, go checkout my Instagram @sewmuchglitter and let me know that you stopped by. Leave a comment on your favorite project and if I have inspired you don’t forget to tag me #sewmuchglitter with your project. I am also creating for card exchanges and cards for donation to spread creativity to others. So, don’t forget to subscribe to my blog so you can be notified of future projects and ideas. I have another fun gadget to share with you, to expand your crafting toolbox.

Sewmuchglitter

Creative Inspiration

During times like these we can loose our creative mojo. I feel it to and allow myself to get preoccupied by other things that don’t bring me happiness. I wanted to share some fun inspiration with you today. If you ever find yourself in a creative slump, I hope these tips help you!

Because I am a total paper nerd, I will start with paper. Aside from buying paper (the best is online: scrapbook.com, Stamps of Life, Maymaymadeit.com are a few of my top favs), I love organizing my paper hoard. The next time I can create it is easier to find. The first and best thing to get your creative juices flowing is organizing your space and supplies. I also like to put on a good movie, true crime documentary or some guilty pleasure on Netflix and create card bases. Just get out your paper trimmer, score board and find a happy place to watch and cut. Next time you need to create a card quickly, it’s 1/2 complete! You can also cut layering pieces (check out my previous blog posts for sizing) this will jump start a background.

Speaking of backgrounds, they are a fun creative jolt when multiples. I love ink blending and creating different looks by splashing water, adding stencils or mixing colors. If you don’t want to or don’t have time, stash them away for a complete card later. This just helps the creativity clear my head.

I also love large stamps! Colorado craft company has a great line of big and bold stamp sets. They take up a lot of space on a card, but they are ment to be the focal point and are a lot of fun to color. I experiment with different coloring techniques and have fun adding elements such as nuvo’s crystal glaze or a fun gelly roll pen accent. When you’re ready, the fun part is putting these two together! Don’t have large stamps, no worries! Just simply stamp images and color away or leave white for a great monochromatic look. When creativity strikes, you’ll be ready!

Shopping of course is always fun. Who dosen’t love a good Hobby Lobby trip of traveling the isles at Joann’s? I enjoy whipping out a good coupon at Micheal’s. But I realize this is not always possible and it tends to clog up my semi organized chaos. I still never resist a good craft shopping trip. SHHH, it’s my weakness. With 2020 being so great (haha) I also got the online shopping bug.

I hope this helps you or one of your crafty friends! Comment below your favorite way to bust through a creative lockup. Go on over to Instagram or Facebook @sewmuchglitter and check out some great ideas. Say HELLO when you are there. If I inspire you to create something, tag #sewmuchglitter. Gaining inspiration from others is spreaking joy, we all need more joy in 2020.

Stay well, stay cool and I’ll be back for some mid week fun.

Sewmuchglitter

Welcome Weekend

Thanks for joining me today and I hope you were able to treat yourself with the yummy recipe from my previous blog post (go check it out) 🙂

I had a super busy week with legal writings and midterms. Phew! I survived. It’s hard to get back into the learning groove but I’m glad I am. This next phase of my career will be a welcomed change. I encourage you to do what you have always wanted and accept the challenges ahead. Learning something new is always a great adventure. Since I was overwhelmed this past week, it was hard to get creative. But creativity of recent past rewarded me and I want to share that with you in hopes that it will inspire to to share your creativity with others.

My creations for donation

Since this pandemic and my recent retirement, I have found myself with extra time and a thirst for positivity. I know I am not alone and I was introduced to a great organization at the same time. Cardz for Kidz is an organization that accepts home made cards and sends them around the world to kids in hospitals and seniors in retirement/assisted facilities. They also donate much needed technology and supplies to those facilities. You can find them on my Instagram @sewmuchglitter in my posts just to see what they are all about. Don’t forget to say Hi while you’re there!

A great Michael’s find

I recently made a lot of cards participating in The daily marker 30 day coloring challenge. Above and beyond what my trusty card keeper from Michael’s can hold. So I sent them on to Cardz for Kidz. Like I said, I was introduced to the organization by one of my Instagram followers, I investigated and found them to be a reputable organization, so I felt comfortable that my creations would be appreciated. If you ever doubt an organization that accepts home made cards, go to Scrapbook.com and they have a section for reputable organizations that accept card donations (they also accept home made cards).

I tried to keep this short, sorry! I was featured on their Instagram account with a fun note about how they appreciate home artists and their creations. Go check out the post on my Instagram, it is always fun to share appreciation and spotlight worthy causes that help others. If you feel inclined to make up some cards and donate them to Cardz for Kidz, check out some of my previous blog posts for inspiration. If my projects do inspire you, tag me #sewmuchglitter with your version of what was created.

Remember my sneak peek?!

I am still participating in the coloring challenge and encourage you to take time for yourself as well. Have a great weekend, be well and stay safe. I will be back next week with a post to keep you motivated 🙂 Let me know in the comments below if you would like to see a fun food project of if you would like to see a creative paper project. It is Christmas in July, so don’t think I won’t throw a fun Christmas project in there somewhere.

See you soon!

Sewmuchglitter

Floating in to say Hi

Hello crafty people. The goal of this weekend is to stay cool. Triple digits here in San Diego County. I wanted to follow-up on my last post. The fun pool floaties found a home!

My goal was to show you how I made my shaker cards but I didn’t quite perfect them so I want to inspire you with a simple creative summer fun card. Don’t worry, I’ll be back with some shaker cards. My legal writings have occupied a lot of time so I don’t want to rush anything I haven’t perfected to pass onto you.

I love designer card stock as it really helps create a fun scene.
The most difficult part of this card was riffling through my paper hoard but I knew I wanted something for summer, so that gave me a direction (it helps to somewhat organize the hoard).

  1. I started with an A2 card base (I like a heavier card base, 110+ lb card stock) then I trimmed the layering piece down to 5.5 x 4.25 (A2 card), I did not create a boarder between my card base and my layering piece. If you want to that would be fun, I normally cut the layering piece 1/8″ less than the base. *If you want a sentiment on the card front, now is a great time to add it.
  2. I knew I needed a pool for my floaties, so I got out my inks and chose a color closest to water as I had and started blending onto the card stock.
  3. My blending tip here is to put the ink on your blending tool (I have a previous post for my favorites) and then start blending off the card stock before moving the tool onto the card stock. You will get a softer look and hopefully prevent those harsh lines. I lightened up the pressure the further up the card stock I got in order to add depth to my pool.
  4. Next, adhere the floaties to the pool. I used foam tape to prop them up.
  5. Water splashes, right!? Perfect time for sequins. I added blue shiny sequins as water splashes.
  6. I use Art Glitter Glue, dries clear (no glitter involved).
  7. Add small drops of glue first where you want the splashes.
  8. Now with tweezers or a pick up tool (I use We R Memory Keepers Quick Stick as one side is sticky).
  9. Place the sequins in the tacky glue, trust me! sequins and glitter adhere better to tacky glue compared to fresh wet glue.
  10. let dry
  11. Attach the layering piece to the card base.
  12. TADA, you’re done! *Add any inside sentiments as desired.

I would love to see what you do to create a simple card front or layout. Tag me #sewmuchglitter with your creations that I have inspired. Stop on by my Instagram @sewmuchglitter to checkout what’s new. Time management has been my recent struggle but there is always time for creativity! Comment below to let me know what your favorite season to craft for is….It is Christmas in July by the way 🙂

Sneak Peek at what’s to come!

Stay safe and I will see you soon!

Sewmuchglitter

Coloring Challenge

Happy Wednesday! I hope you had a great Fourth of July and are finding yourself well today. I wanted to share a quick bit on the 30 day coloring challenge I’ve discussed before. Hopefully some mindless fun will get you through your week (we all need distractions in 2020!)

As featured on Kathyrac IG

I enjoy taking part in @Kathyrac 30 day coloring challenge on Instagram that she hosts a few times a year. Just set aside 10 minutes a day for yourself and color. Color anything that makes you happy, use any form of coloring. I enjoy using all of my coloring supplies at least once during this challenge because I always learn something new. Let me show you what I recently worked on.

Summertime inspiration

I enjoy stamping a lot of images at one time, coloring them and them coming back later to create a full project. Sometimes we don’t have the time to commit but we enjoy the creative process. I stamped these Stamps of Life images in Versa Fine black onyx ink, colored them in with my prisma colored pencils (any colored pencils will work) and blended the coloring smooth with my blending stumps and gamsol. You can find the supplies at any major retailer, Amazon, and the stamps only at The Stamps of Life.com (if you order, tell me first I can help get you points for goodies!). Don’t forget to check my previous blog post about paper choices because it matters for best results. Come back this weekend for a finished project. I have a great idea, just not the time in one sitting.

Comment below how you enjoy taking your creative time in tidbits. Taking time for ourselves serves everyone in a positive way, the 30 day challenge gives me the perfect excuse. Check out my Instagram/Facebook/Pinterest @sewmuchglitter to see what’s happening.

Enjoy the rest of your week!

Sewmuchglitter

Artful Meditation

Happy Wednesday! Sometimes life gets us bogged down. Whenever you feel that way, it’s time to reset!

I like to meditate through art. Something as simple as organizing my supplies or getting involved with a new project can help. I’ve been experimenting with watercolors, which helps me reset. Thanks to The Daily Marker 30 Day, I have the perfect excuse. I’m not going to lie, some of those artists can intimate me but I’m not creating for competition, I’m creating for myself.

Use your Imagination.

Turn on some music, a favorite podcast, a desired program, or create in silence. Whatever you desire just jump in where you’re happy. I truly enjoy creating backgrounds and coloring stamped images.

Go check out my previous blog posts to help you get started. When watercoloring a background, I find the wetter the better, I get a fun natural look. Paper matters (another previous post 😉).

Embossed Spots

Mix it up! I love embossing with my coloring because it adds another dimension. Whatever you desire and don’t aim for perfection because we will always find flaws in ourselves that others won’t.

I hope this helped get you through your week. Go check out my Instagram/Facebook/Pinterest @sewmuchglitter for inspiration. Don’t forget to tag #sewmuchglitter with your inspired creations. The next 30 day coloring challenge starts TODAY July 1st. Just create, tag #thedailymarker30day, and post what you’re working on. It’s fun and gives us time for artful meditation.

Happy July 😊

❤sewmuchglitter

Mid-Week Pick me up

I hope you find yourself well. Since this post is a mid-week pick me up, it will be a shorter version of what you have to look forward to at the end of your week. Let’s slim it down.

Slim line cards are getting attention in the card making world. Just like the A2 card bases I have discussed (if you haven’t seen my previous posts go check them out), a slim line card needs to be sturdy so I choose at least a 100 lb card stock in a color of your choice (Joann’s has great card stock for a base). The fun thing about creating a slim line card is that they fit in a standard #10 business sized envelope and require NO additional postage.

Start out with an 8 1/2 x 11 inch piece of card stock, trim it down to 8 1/2 x 7. Now it’s time to get out your score board and bone folder. There are several brands and it’s all about personal preference. I use an EK Tools board, which comes with a bone folder. I got this at Hobby Lobby (use your coupon!) I prefer my Amazon.com bone folder as it is softer, so there is less risk of cutting my paper (always score at an angle). OK, let’s score this!

Lay the trimmed paper on your score board with the 7″ side at the top, score it at 3.5″, fold on the score line and you’ve got your slim line card base. It’s that easy! My tip for you is: leave some space between your paper and the top of your score board because you will stay within the groove of your scoring measurement.

Slim line card base

I hope you enjoyed this quick mid-week pick me up. Come back Sunday so we can create a front for this slim line card base.

Enjoy the rest of your week! Check out @sewmuchglitter on Instagram/Facebook/Pinterest to see what’s going on. If you are inspired by anything you see, tag me #sewmuchglitter on your social media. Together we can inspire others!

Subscribe and come back soon!

Blending Tools

Welcome back! In my last post I said I’d be back soon with my favorite blending tools, so let’s get started!

First off, there is no right or wrong blending tool. There is a better technique but tools are a personal preference. Use what you’re comfortable with and use what gets you your most desired results. The market is overwhelmed with crafting products and I admit that I also fall prey to buying the latest and greatest.

My most preferred blending tool is a blending brush. As you can see, mine are color coordinating. Using similar colors on brushes helps with ease of use and cleaning (or lack of cleaning). The brushes give me the smoothest blends and can fade as desired. These bristles hold color well and clean off well. Their soft providing a smooth blend. I got mine on Amazon.com and they were inexpensive (under $15), not bad for repetitive use.

Next up there’s a blending tool with foam Velcro (on the back) heads. I have a flat attachment and a rounded attachment. Both are for the same purpose but from different companies expecting different results. I find the flat head to leave a harsher line but I’ll discuss techniques later. These are foam and need more ink to get a fuller blend. They do serve a great purpose on smaller projects. The rounded attachment is also a foam but not as porous as they seem to have a slicker surface. These blend over my papers more smoothly than the flat heads. I still find myself reaching for more ink mid project and I DO NOT with the brushes mentioned above. I still use these in color families. The blending handles can be purchased at any major crafting store or my personal favorite, Scrapbook.com. The flat foam attachments can be purchased with multiples in a pack at your local craft store or the rounded attachments at Scrapbook.com as they are a Scrapbook.com exclusive. Both have great price points and both clean well. Let’s talk technique!

Techniques. Start off the project 1st to avoid harsh lines. Remember I prefer a glass mat or a craft mat for easy cleaning. Next, I start small. DO NOT BLEND LARGE AREAS AT ONE TIME. You’ll never get the results you want. Once you get a smaller blend, move out to larger areas. Before you know it, you’ll have a fully blended project! I learned this the hard way and gathered my inspiration from Tim Holtz and experience. Don’t stop here, there’s more!

Color coordinating. As I stated in a previous blog post, I use Distress Oxide and Distress Inks. I stated the formula difference in simple terms. Go check out my blending post. I use Distress Oxide and my other inks aka. Other brands, with the same tools. Clean in-between by simply rubbing on a paper towel or baby wipe. TA-DA cleaned! May be stained but won’t contaminant each other. Remember Oxide is a hybrid. Now, my Distress inks are a little different. I only use specific tools on that formula (not hybrid) they can get contaminated. For the purpose of cost, I use my Velcro heads for this. I’ll show you how I store them in another storage post coming up. Subscribe so you don’t miss that!

I hope this helped inspire you and answered any follow-up questions you may have had since my last post. DON’T FORGET to check out my other forms of social media: Facebook/Instagram/Pinterest @sewmuchglitter Let me know you were there and what you would like to see more of. If you are inspired by any of my projects or techniques please tag me on your social media #sewmuchglitter

Don’t miss out and subscribe to my blog. You’ll be notified of new posts, which could contain great inspiration and ideas for your creative side. Leave me a comment and let me know which blending tools you prefer.

SEE YOU SOON!

Let’s talk paper

Thanks for joining me. I hope everyone is safe and well. Just as we thought 2020 couldn’t get anymore challenging, we are faced with sad circumstances. On a positive note, it is great that we can still still come together to witness the revolution of space exploration. I grew up during a time that NASA was embraced and it’s exciting to see that become a reality again.

I’m not here to create a forum about our differences but here to create a place where we can share our creativity and gather inspiration. So, on that note……LET’S TALK PAPER!

We all create things differently and have different design tastes, but we still use the staples, like paper! I am a big paper crafter and have realized that not all paper is created equal. We see some retailers or influencers tell us that the paper doesn’t matter but the other products do, and we have some tell us only the paper matters. So which is it? We kind of have to figure that our on our own. I am here to share my experience with you and hope it helps guide you the next time you are walking the craft store isles.

FIRST, let’s talk watercolor paper. In my experience, this DOES matter. Water generally breaks down paper and eventually rips it. The thicker the watercolor paper, the better. There are different textures, hot or cold pressed. I’m not a scientist so I will share that Strathmore watercolor paper cold pressed 300 series is my favorite. It is thick enough to take on a lot of water and allow the colors to remain as vibrant as you want them. I am a stamping water-colorist because my free hand skills aren’t great. This paper can handle it all and remain intact. Water coloring on regular card stock, no matter how thick can be a mess. This is my best recommendation. The price point is a bit higher but so is the quality (get your coupons out!)

NEXT up let’s discuss mixed media paper. There is a world of mixed media paper to be discovered. I don’t just watercolor, so mixed media papers are my go to. Especially when Michael’s has BOGO! I’ve experimented in this area a lot. My work horse has been Canson XL mixed media paper 98 lb. I can watercolor without the paper pilling as long as I do not stay in the same area for too long (it’s not Strathmore but it’s versatile). I can use my prismacolor pencils and gamsol on this paper and I can use my alcohol markers without a problem. The price point is great too, that’s why it’s my most used.

Another mixed media paper I have tried is also a Strathmore, but mixed media (98lb) I got this at Target. Now that Target has spruced up their craft section I always have to look. This price point is a little more than the Canson XL and the quality does NOT hold up. I was very disappointed. The paper pills with very little water and it smears other mediums. I do not know if the quality was subpar because it was sold at Target or if it is just that paper. Either way, there are plenty of other products to spend your money on. Let’s talk about those!

As we keep moving along, lets address marker paper. I’m specifically referring to alcohol markers when discussing this paper but the marker world is large, so please share your experiences with me in the comments below. Ok, We’ve rounded back to Strathmore again. I LOVE their marker paper 400 series 50 lb. It is smooth, spreads the color beautifully and does not soak it in. Your projects remain vibrant and clear. Again, another great Micheal’s BOGO opportunity! This price point is comparable to that of Canson XL, so even without a sale, you get your money’s worth. On a side note, I have used Crafter’s Companion alochol marker paper and really enjoy that too. It is harder to find in retail but is sold online and HSN. I feel the better deal is the Strathmore because Hey, I make mistakes and throw things out sometimes. I don’t feel like I’m loosing with the Strathmore when that happens.

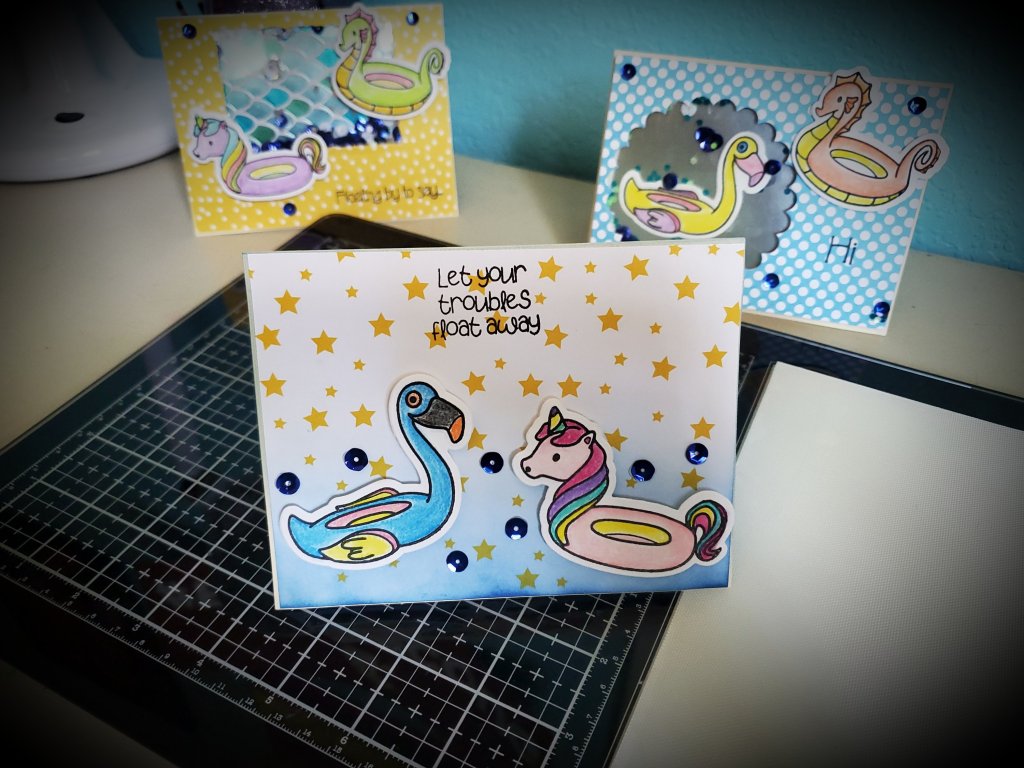
OK, those are a few of my favorite papers. I hope this helps you. The options can be overwhelming. Please share with me your favorite papers in the comments below. Don’t forget to checkout my Instagram/Facebook: @sewmuchglitter for the projects I have completed with these papers. And tag me #sewmuchglitter in the projects you have used or tried because of my recommendations. I realize this was long-winded but chats can be that way.

If there’s a project you’d love to see, tell me in the comments below. I’ll be back very soon! Checkout Instagram for sneak peeks.